How To Clip Sugar Glider Nails
Clipping a sugar glider’s nails may seem like a daunting task, but with the right knowledge and techniques, it can be a simple and stress-free process. In this article, we will guide you through the steps of how to clip sugar glider nails, ensuring the safety and well-being of your furry friend.
Why is it important to clip sugar glider nails?
Sugar gliders use their long and sharp nails for climbing, leaping, and gripping. Over time, these nails can become too long and pose a risk to both your sugar glider and yourself. Long nails can get caught in toys or fabric, leading to injuries and accidents. Additionally, when sugar gliders climb and jump on you, their long nails can inadvertently scratch and cause discomfort.
By maintaining proper nail length, you can prevent these issues and provide your sugar glider with a comfortable and safe environment. Clipping their nails is a routine grooming task that should be done regularly to ensure their well-being.

How to prepare for nail trimming
Before you begin the nail trimming process, it’s essential to gather all the necessary tools and create a calm and comfortable environment for your sugar glider. Here are some steps to follow:
1. Gather the tools: You’ll need a pair of small animal nail clippers or human nail clippers with a straight edge, styptic powder (in case of accidental bleeding), treats for positive reinforcement, and a soft towel or blanket to wrap your sugar glider.
2. Choose the right timing: Sugar gliders are most active at night, so it’s best to schedule the nail clipping session during their waking hours. Make sure they are awake, alert, and not too active or agitated.
3. Find a quiet space: Pick a quiet room without distractions where you and your sugar glider can focus on the task at hand. This will help keep them calm and prevent unnecessary stress.
4. Create a soothing environment: Before you begin, dim the lights, play some soft music, or provide a comforting and familiar pouch or sleeping area for your sugar glider to relax in.
Step-by-step guide to clip sugar glider nails
Now that you have prepared the necessary tools and created a suitable environment, it’s time to start clipping your sugar glider’s nails. Follow these steps for a smooth and stress-free process:
1. Wrap your sugar glider in a soft towel or blanket: Gently and securely wrap your sugar glider in a soft towel, leaving only one paw exposed at a time. This will prevent them from squirming or escaping during the nail clipping process.
2. Use treats for positive reinforcement: Before you begin clipping, offer your sugar glider a small treat to associate the process with something positive. This will help keep them calm and cooperative.
3. Inspect the nails: Carefully examine your sugar glider’s nails, looking for any signs of overgrowth, splitting, or sharp edges. Identify the transparent area of the nail called the quick, which contains blood vessels and nerves. It’s essential to avoid cutting into the quick to prevent pain and bleeding.
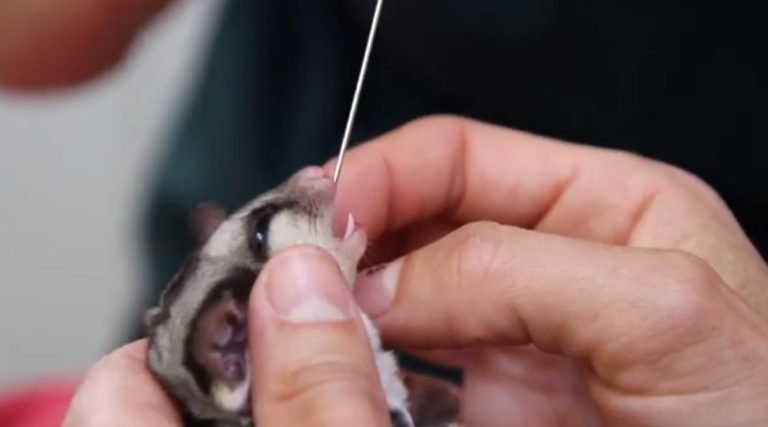
4. Trim the nails: Once you have familiarized yourself with the nails’ structure and identified the quick, gently hold your sugar glider’s paw and position the clippers perpendicular to the nail, just above the quick. Make a quick and decisive cut to remove the tip of the nail. Take caution and only clip a small amount at a time to avoid cutting into the quick.
5. Reward and repeat: After each successful nail trimming, reward your sugar glider with a treat and praise. Move on to the next paw and repeat the process until all the nails are trimmed to an appropriate length.
6. Monitor for bleeding: In some cases, accidental bleeding may occur if you accidentally cut into the quick. If this happens, apply styptic powder or cornstarch to the bleeding area to stop the bleeding. Applying gentle pressure with a clean cloth or cotton ball can also help. Monitor the nail and seek veterinary assistance if the bleeding doesn’t stop or if there are signs of infection.
Frequently Asked Questions
1. How often should I clip my sugar glider’s nails?
The frequency of nail clipping depends on your sugar glider’s individual needs. On average, it’s recommended to trim their nails every 2-4 weeks. However, some sugar gliders may require more frequent nail trims if their nails grow quickly or if they have a tendency to scratch and damage themselves.
2. Can I use a nail file instead of clippers?
While some sugar glider owners prefer using a nail file or emery board to gradually file down their nails, it may be more time-consuming and require greater cooperation from your sugar glider. Nail clippers are generally quicker and more efficient for maintaining nail length.
3. What if my sugar glider becomes stressed or agitated during nail clipping?
If your sugar glider becomes stressed or agitated during the process, it’s important to remain calm and patient. Take breaks if needed and resume the nail clipping session at a later time. It may be helpful to gradually acclimate your sugar glider to the process by introducing the clippers near them before attempting the actual trimming.
4. Are there any alternatives to ease my sugar glider’s long nails?
In addition to regular nail trimming, providing appropriate surfaces and toys for your sugar glider to climb and play on can help naturally wear down their nails. Chewing toys made of safe materials are also beneficial for maintaining nail health.
Final Thoughts
Mastering the art of clipping sugar glider nails takes patience, practice, and a calm approach. By following the steps outlined in this article and establishing a routine grooming schedule, you can provide your sugar glider with well-maintained nails and a happy, healthy lifestyle. Remember to always prioritize their safety and well-being during the process and seek veterinary assistance if needed. With time, both you and your sugar glider will become more comfortable with the nail clipping routine, making it a breeze for both parties involved.


