Homemade Sugar Glider Cages
Are you ready to take your sugar gliders’ living space to the next level? Look no further than homemade sugar glider cages! These DIY creations offer a range of benefits that will leave both you and your furry friends thrilled. With customizability, cost-saving advantages, and the chance to create a unique habitat tailored specifically for your sugar gliders, it’s no wonder many owners are opting for homemade cages.
By building your own glider cage, you can ensure that every inch of space is designed with their needs in mind. Forget about generic store-bought options – with homemade cages, you have full control over the size, layout, and features. Plus, it’s an opportunity to unleash your creativity and bond with your sugar gliders on a whole new level.
Ready to get started? In this tutorial, we’ll guide you through the process step by step so that even if you’re not particularly handy with tools or instructions, you can still create a comfortable and safe haven for your beloved sugar gliders. Join our SGG Facebook group for additional tips and tricks from experienced owners who have already embarked on this rewarding journey. Get ready to provide the perfect home for your sugar gliders – one that they’ll truly thrive in!
How to Make a Safe Sugar Glider Cage Set:
Creating a secure cage set for your sugar gliders is essential to their well-being. Follow these step-by-step instructions to ensure they have a safe and stimulating environment.
- Provide Ample Space and Stimulation:
- Sugar gliders are active animals that require plenty of space to climb, glide, and play.
- Opt for a large cage that allows them to move freely.
- Include branches, ropes, and ladders to encourage exercise and exploration.
- Essential Components:
- Install sturdy perches at varying heights to mimic their natural habitat.
- Include nesting boxes or pouches where they can rest and sleep comfortably.
- Incorporate toys such as wheels, tunnels, and hanging objects to keep them mentally stimulated.
- Safety First:
- Ensure proper ventilation in the cage by providing adequate airflow.
- Use materials that are non-toxic and safe for your sugar gliders.
- Check for any potential hazards like sharp edges or small openings that they could get stuck in.
- Double-check the design of the cage to make sure it is escape-proof.
By following these guidelines, you can create a homemade sugar glider cage that provides both safety and stimulation for your furry friends. Remember, their well-being should always be a top priority when designing their living space.
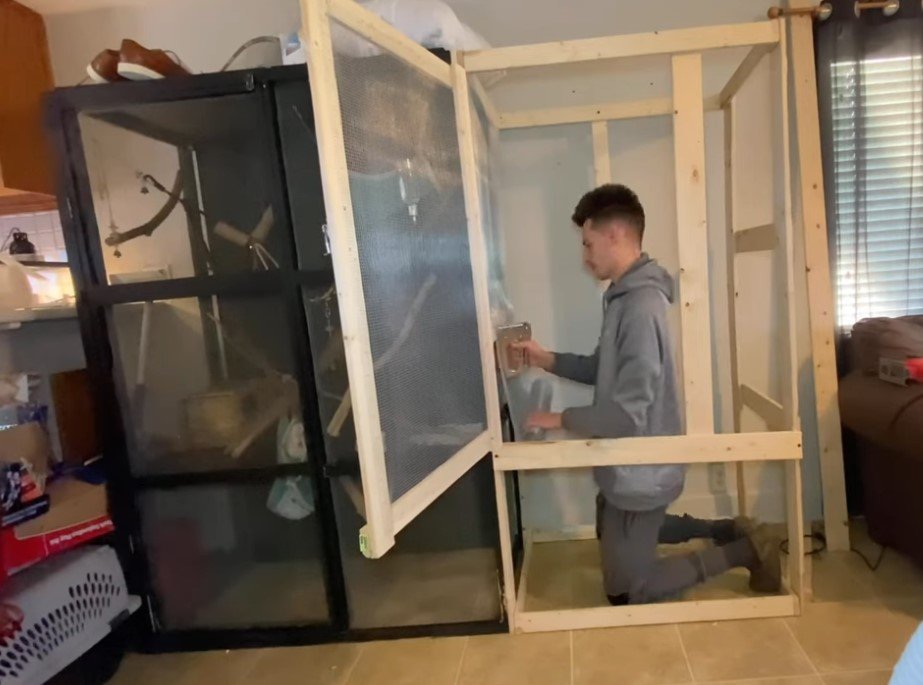
DIY PVC Pipe Cage for Sugar Gliders:
If you’re looking to create a homemade sugar glider cage, using PVC pipes is a fantastic option. Not only are they versatile and durable, but they also offer numerous benefits for your furry friends.
Benefits of Using PVC Pipes:
- PVC pipes provide excellent durability, ensuring a long-lasting cage for your sugar gliders.
- They are lightweight and easy to work with, making the assembly process hassle-free.
- PVC pipes are resistant to corrosion and moisture, maintaining the integrity of the cage over time.
- The smooth surface of these pipes prevents any potential harm or injury to your sugar gliders.
Versatility and Durability of PVC Pipe Constructions:
- With PVC pipes, you can easily customize the size and shape of the cage according to your preferences.
- Add wire mesh panels to enhance ventilation while keeping your sugar gliders safe inside.
- Incorporate plastic trim pieces to give the cage a polished look while protecting against sharp edges.
Assembling a PVC Pipe Cage:
- Start by measuring and cutting the required lengths of PVC pipe according to your desired dimensions.
- Connect the pieces using appropriate connectors or adhesive designed specifically for use with PVC pipes.
- Attach wire mesh panels securely to the frame using zip ties or screws.
- Install plastic trim pieces along any exposed edges for added safety.
Customization Options:
- Include multiple levels within the cage by adding additional horizontal bars across the frame.
- Attach hammocks or hanging toys from various points in the cage for enrichment purposes.
- Provide platforms or shelves made from wood or plastic as resting spots for your sugar gliders.
Creating a homemade sugar glider cage using PVC pipes allows you to tailor it precisely to meet your pets’ needs. By following these simple steps and incorporating various accessories, you can ensure a comfortable and secure environment for your sugar gliders to thrive in.
Tips and Suggestions for Building a DIY Sugar Glider Cage

Get expert advice on choosing the right location:
- Consult with professionals to determine the ideal spot for your homemade cage.
- Consider factors such as noise level, temperature, and natural light exposure.
- Ensure the location provides a comfortable environment for your sugar gliders.
Optimize your cage layout for easy cleaning and maintenance:
- Design the cage in a way that allows for effortless cleaning.
- Use removable trays or platforms to simplify waste removal.
- Incorporate materials that are easy to wipe down and sanitize.
Incorporate features that promote exercise, mental stimulation, and socialization:
- Include branches or perches at varying heights to encourage climbing and jumping.
- Add toys or puzzles that provide mental stimulation for your sugar gliders.
- Create separate areas within the cage to allow for privacy or social interaction.
By following these DIY tips, you can create a homemade sugar glider cage that meets the needs of your pets while providing a safe and stimulating environment.
Sizing Considerations for Homemade Sugar Glider Cages
Size is an important factor to consider. Here are some key considerations when determining the appropriate size requirements for your gliders:
- Number of Gliders: Take into account the number of sugar gliders you have. Each glider should have enough space to move around comfortably and engage in natural behaviors.
- Vertical Space: Sugar gliders are arboreal creatures, meaning they love to climb and jump. Ensure that your cage provides ample vertical space for them to explore and exercise their natural instincts.
- Minimum Dimensions: Calculate the minimum dimensions needed to ensure adequate movement within the cage. This will vary depending on the number of gliders you have. As a general guideline, aim for a cage that is at least 24 inches wide, 24 inches deep, and 36 inches tall.
- Additional Space: Don’t forget to factor in additional space needed for toys, food dishes, and sleeping areas. Sugar gliders enjoy having enrichment items in their cages, so make sure there is enough room for these accessories without overcrowding the living space.
By considering these sizing considerations, you can create a homemade sugar glider cage that provides a comfortable and stimulating environment for your furry friends.
Remember: The well-being of your sugar gliders should always be prioritized when designing their habitat.
Choosing the Right Materials for Your Homemade Sugar Glider Cage
Safe and Non-Toxic Options
It’s crucial to choose materials that are safe and non-toxic for these adorable creatures. Here are some options you can consider:
- Fleece: Using fleece as bedding material is a popular choice among sugar glider owners. It provides comfort and warmth while being easy to clean.
- Wood: Selecting the right type of wood is essential to ensure the safety of your sugar gliders. Avoid using toxic woods such as cedar or pine, as they can be harmful to their respiratory systems. Instead, opt for safe options like oak or maple.
Preventing Escapes with Wire Mesh
To prevent your sugar gliders from escaping their homemade cage, it’s important to choose suitable wire mesh options. Consider the following:
- Opt for wire mesh with small gaps that prevent your gliders from squeezing through.
- Ensure the wire mesh is securely attached to the frame of the cage to prevent any loose ends or gaps.
Visibility with Acrylic or Glass Walls
While designing your homemade sugar glider cage, you may want to consider using acrylic or glass for the walls. This allows visibility and enables you to observe your pets easily. Here’s why it can be beneficial:
- Acrylic or glass walls provide a clear view of your sugar gliders’ activities.
- They allow natural light into the cage while still providing a secure enclosure.
By choosing appropriate materials, considering suitable wire mesh options, and opting for acrylic or glass walls, you can create a safe and comfortable homemade sugar glider cage that meets all their needs.
Remember always to prioritize the safety and well-being of your furry friends when designing their living space!
Final Thoughts
In conclusion, creating the perfect homemade sugar glider cage requires careful consideration of safety, sizing, materials, and construction techniques. By following the tips and suggestions provided in this guide, you can ensure that your DIY sugar glider cage is both secure and comfortable for your furry friends.
It is crucial to prioritize features such as escape-proof latches, sturdy construction, and appropriate spacing between bars or mesh. This will help prevent any potential accidents or injuries.
DIY PVC pipe cages offer a cost-effective and customizable option for housing sugar gliders. The lightweight nature of PVC makes it easy to work with while providing durability. These cages can be designed to include multiple levels and accessories to keep your sugar gliders entertained.
Considerations of size are essential when building a homemade sugar glider cage. Providing enough space for climbing, jumping, and exercise is vital for their overall well-being. Ensure that the dimensions of the cage meet the recommended guidelines based on the number of sugar gliders you plan to house.
Choosing suitable materials is another critical aspect. Opting for non-toxic materials that are easy to clean will contribute to maintaining a healthy environment for your pets. Avoid using materials such as treated wood or harmful chemicals that could pose risks to their health.
To further enhance your knowledge on homemade sugar glider cages, continue researching reputable sources online or consult with experienced pet owners who have successfully built their own cages. Remember that each sugar glider has unique needs and preferences; therefore, personalizing their living space can greatly benefit their overall happiness.
Now that you have gained insights into creating homemade sugar glider cages, it’s time to put what you’ve learned into action! Begin planning and constructing a safe and comfortable habitat that meets all the necessary requirements for your beloved pets.
FAQs
1.How much does it cost to build a homemade sugar glider cage?
Building costs for homemade sugar glider cages can vary depending on the size, materials used, and any additional accessories. On average, you can expect to spend anywhere between $50 to $200.
2.Can I use a regular bird cage for my sugar gliders?
While bird cages may seem similar in structure, they are not suitable for housing sugar gliders. Sugar gliders require cages with horizontal bars or mesh that allow them to climb and glide freely.
3.How often should I clean my homemade sugar glider cage?
It is recommended to clean your sugar glider’s cage at least once a week. Regular cleaning helps maintain a hygienic environment and prevents the buildup of bacteria or odors.
4.What type of bedding should I use in the homemade sugar glider cage?
Avoid using cedar or pine shavings as bedding material since they can be harmful to sugar gliders’ respiratory systems. Opt for safe alternatives such as shredded paper, fleece liners, or coconut fiber.
5.Can I decorate the homemade sugar glider cage with toys and accessories?
Absolutely! Providing enrichment through toys, branches, hammocks, and other accessories is essential for keeping your sugar gliders mentally stimulated and physically active within their enclosure.


