
How To Wash Sugar Glider Bedding
Keeping your sugar glider’s cage clean is crucial for their overall health and happiness. But have you ever wondered how to properly wash their bedding? Well, you’re in the right place! In this guide, we’ll explore the importance of maintaining cleanliness in sugar glider cages and how washing their bedding directly contributes to their well-being.
Sugar gliders are known for their playful nature and unique personalities, but they can also be quite sensitive creatures. Maintaining a clean environment helps prevent bacteria buildup and reduces the risk of infections or respiratory issues. By regularly washing their bedding, you ensure that your furry friends have a safe and hygienic space to thrive.
Throughout this article, we’ll delve into various cleaning techniques and discuss the recommended frequency for washing sugar glider bedding. So let’s dive in and discover how you can keep your sugar gliders happy and healthy with proper bedding maintenance!
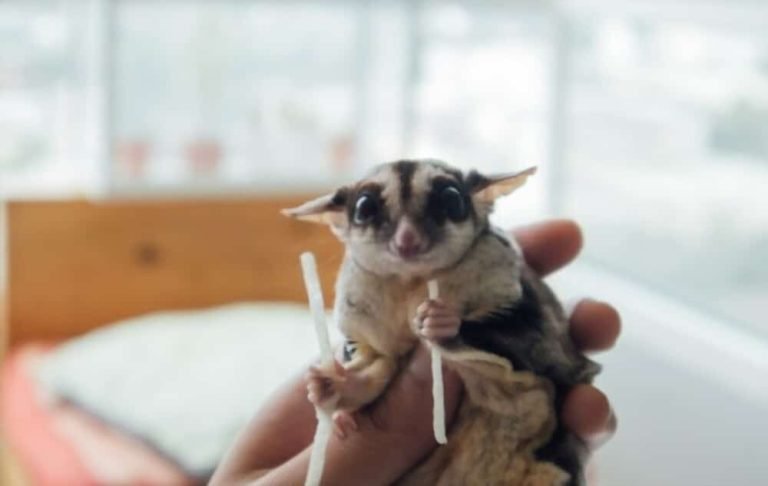
Can sugar gliders get wet and how to clean their pouches?
Why sugar gliders should not be soaked or submerged in water
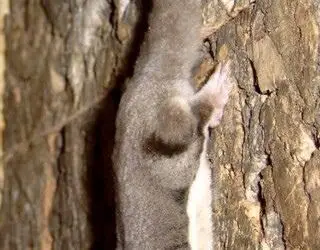
Sugar gliders are adorable little creatures that require special care, especially. While it may be tempting to give them a bath like you would with a dog or cat, sugar gliders should never be soaked or submerged in water. This is because they have a unique physiology that makes them susceptible to respiratory issues if they get wet.
Sugar gliders have a thin membrane called the patagium that stretches from their wrists to their ankles, allowing them to glide through the air. This delicate membrane can easily become waterlogged, making it difficult for the sugar glider to move properly and increasing the risk of respiratory problems. Their fur is not designed to repel water like some other animals, so getting wet can cause discomfort and stress.
Tips for gently cleaning sugar glider pouches without causing stress
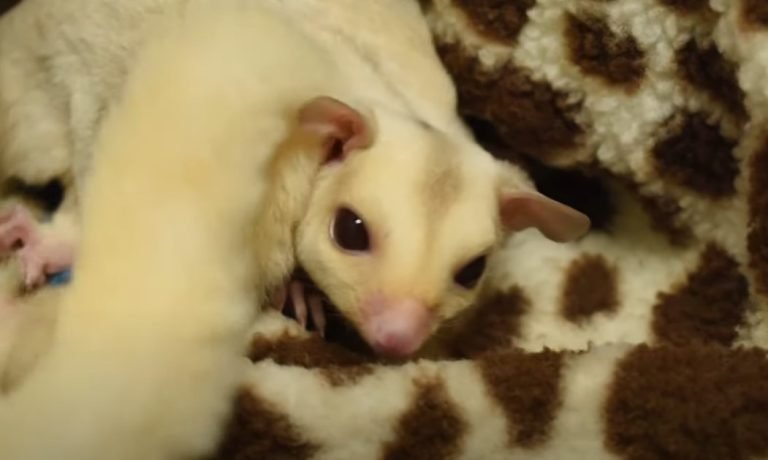
While you shouldn’t give your sugar glider a full bath, it’s still important to keep their bonding pouches clean. These pouches are where sugar gliders spend most of their time sleeping and carrying their young, so regular cleaning is essential for maintaining good hygiene.
Here are some tips for gently cleaning sugar glider pouches without causing stress:
- Remove the soiled pouch: Carefully take out the dirty pouch from your sugar glider’s cage.
- Shake off loose debris: Give the pouch a gentle shake outdoors or over a garbage bin to remove any loose bedding or waste.
- Spot clean with mild detergent: Use a small amount of mild detergent mixed with warm water and a soft cloth or sponge to spot clean any stains on the pouch.
- Rinse thoroughly: After spot cleaning, rinse the pouch thoroughly with warm water until all traces of detergent are removed.
- Air dry completely: Hang the pouch in a well-ventilated area or use a low heat setting on your dryer to ensure it is completely dry before returning it to the cage. Moisture can lead to bacterial growth, so it’s important to make sure the pouch is fully dry.
Importance of ensuring pouches are completely dry before returning them to the cage

Ensuring that sugar glider pouches are completely dry before putting them back in the cage is crucial for their health and well-being. Damp or wet bedding can create an ideal environment for bacteria and mold to grow, which can lead to various health issues for your sugar glider.
Here’s why it’s important to ensure pouches are completely dry:
- Preventing respiratory problems: Sugar gliders are prone to respiratory issues, and exposure to damp bedding can exacerbate these problems.
- Avoiding skin irritation: Wet bedding can cause skin irritation and discomfort for your sugar glider, leading to potential infections.
- Promoting overall hygiene: A clean and dry environment reduces the risk of bacterial growth and keeps your sugar glider healthy.
Remember, patience is key when caring for sugar gliders.
Proper cleaning techniques for sugar glider bedding:
Using mild, unscented soap for washing bedding materials
It’s important to use a mild, unscented soap. This helps ensure that no harsh chemicals or fragrances are left behind that could irritate your furry friend’s delicate respiratory system. Look for soaps specifically designed for sensitive skin or baby products, as they tend to be gentle and free from strong scents.
Here are some examples of mild, unscented soaps you can use:
- Castile soap
- Baby laundry detergent
- Hypoallergenic laundry detergent
Before washing the bedding, check the label on the soap to make sure it doesn’t contain any harmful ingredients such as bleach or artificial fragrances. These can be toxic to sugar gliders and may cause respiratory issues.
Avoiding harsh chemicals that can harm sugar gliders’ sensitive respiratory systems
In addition to using a mild soap, it’s crucial to avoid any harsh chemicals when cleaning your sugar glider’s bedding. Sugar gliders have extremely sensitive respiratory systems, and exposure to strong chemicals can lead to serious health problems.
Here are some common household cleaning products you should steer clear of:
- Bleach
- Ammonia-based cleaners
- Fabric softeners
- Dryer sheets
Instead of relying on these chemical-laden products, opt for natural alternatives that are safe for both your sugar glider and the environment. Vinegar and baking soda are excellent options for removing odors and stains without posing a risk to your pet.

Thoroughly rinsing and drying bedding to prevent mold or bacteria growth
Once you’ve washed the bedding with a mild soap, it’s essential to thoroughly rinse out all traces of soap residue. Any remaining residue can irritate your sugar glider’s skin or lead to digestive issues if ingested during grooming.
After rinsing, make sure to dry the bedding completely before returning it to your sugar glider’s enclosure. Moisture can promote the growth of mold and bacteria, which can be harmful to your pet’s health. If possible, hang the bedding outside in the sun to air dry, as sunlight helps kill any remaining bacteria.
If you’re using a dryer, set it on a low heat setting to prevent shrinkage or damage to the bedding material. Adding dryer balls or clean tennis balls can help fluff up the bedding and speed up drying time.
Remember, regular cleaning of your sugar glider’s bedding is crucial for maintaining their overall health and well-being. By following these proper cleaning techniques, you can ensure that your furry friend has a safe and comfortable environment to thrive in.
Frequency of Cleaning Sugar Glider Cages and Accessories
Recommended Schedule for Regular Cage Maintenance
Cleaning sugar glider bedding is an essential part of ensuring a healthy and comfortable environment for your furry friends. While there isn’t a one-size-fits-all answer to how often you should clean their cages and accessories, following a recommended schedule can help maintain cleanliness without causing stress to your sugar gliders.
- Daily Spot Cleaning: Start by doing a quick spot check every day to remove any visible waste or soiled bedding. This will prevent unpleasant odors from building up and keep the cage looking tidy.
- Weekly Deep Clean: Once a week, it’s important to perform a thorough cleaning of the entire cage. This includes removing all bedding, toys, food dishes, and accessories before disinfecting the cage itself. Scrubbing the bars, shelves, and base with warm soapy water will help eliminate bacteria and germs.
- Bedding Replacement: During the weekly deep clean, it’s crucial to replace all bedding material in the cage. Sugar gliders are sensitive creatures that rely on scent markers for comfort and familiarity. However, leaving dirty bedding for too long can lead to health issues such as respiratory problems or infections.
Factors Influencing Bedding Washing Frequency
Several factors may influence how often you should wash your sugar glider’s bedding:
- Odor Levels: If you notice a strong odor coming from the cage even after daily spot cleaning, it might be time for a more frequent deep clean. Sugar gliders have scent glands that produce unique smells; however, excessive odor could indicate dirty or soiled bedding.
- Soiling Levels: Depending on your sugar gliders’ habits, some cages may accumulate waste more quickly than others. If you find that their favorite spots are consistently soiled or if they tend to use certain areas as toilets more frequently, consider adjusting your cleaning schedule accordingly.
Balancing Cleanliness and Familiar Scent Environment
Maintaining a clean cage is crucial for your sugar gliders’ health, but it’s equally important to provide them with a familiar scent environment. Sugar gliders rely on their sense of smell to feel secure and comfortable in their surroundings. Here are some tips to strike the right balance:
- Partial Bedding Replacement: Instead of replacing all the bedding during the weekly deep clean, consider replacing only a portion of it. This way, you can maintain cleanliness while preserving familiar scents that provide comfort to your sugar gliders.
- Scent Transfer: To help maintain a familiar scent environment, you can transfer some of the old bedding into new bedding during replacement. This way, your sugar gliders will still have their scent markers present while enjoying fresh and clean bedding.

Rinsing the cage with hot water for thorough cleaning:
A quick rinse with warm water just won’t cut it. These little critters are known for their playful antics and adorable squeaks, but they can also be quite messy. To keep their living space clean and comfortable, it’s essential to give their cage a thorough cleaning every now and then. One effective method is rinsing the cage with hot water. Let’s dive into why this technique works so well and how to do it safely.
Benefits of using hot water to remove dirt, debris, and potential parasites from the cage surfaces
Hot water is a powerful toolDebris, and even potential parasites that may have found their way into your sugar glider’s living space. The heat helps loosen stubborn stains and grime, making it easier to remove them effectively. Hot water can help eliminate any odors that might linger in the cage.
Precautions when handling hot water around pets and avoiding burns or scalds
While hot water can be beneficial for cleaning purposes, we must take precautions when handling it around our pets. Sugar gliders are small animals who love exploring every nook and cranny of their cage. Therefore, ensuring their safety should be our top priority.
Here are some precautions to follow when using hot water:
- Always test the temperature before applying it to the cage surfaces – you don’t want to accidentally burn your little buddy.
- Use gloves or protective gear while handling hot water to avoid burns or scalds on your own hands.
- Keep your sugar glider away from the area being cleaned until everything has cooled down completely.
- Ensure there are no electrical cords near the wet areas as mixing electricity with moisture can lead to accidents.
Ensuring proper ventilation during and after rinsing to prevent moisture buildup
When rinsing the cage with hot water, it’s crucial to ensure proper ventilation to prevent moisture buildup. Excess moisture can create a damp environment that promotes the growth of mold and mildew, which is harmful to both you and your sugar glider.
Here are some tips for maintaining good ventilation:
- Open windows or turn on fans in the room where you’re cleaning the cage.
- Allow sufficient time for the cage surfaces to dry completely before returning your sugar glider to its home.
- Consider using a dehumidifier if you live in an area with high humidity levels.
By following these precautions and ensuring proper ventilation, you can effectively clean your sugar glider’s cage without compromising their health or safety.
Cleaning Sugar Glider Food Dishes and Water Bottles
Maintaining a clean feeding area for your sugar gliders is crucial to their overall health and well-being. Just like us, these adorable little creatures need proper hygiene.
Importance of Hygiene in Feeding Areas
Ensuring a hygienic environment for your sugar gliders’ food dishes and water bottles is essential for several reasons. Firstly, it helps prevent the growth of harmful bacteria that can cause infections or digestive issues in your furry friends. Secondly, maintaining cleanliness reduces the risk of attracting pests or insects that may be attracted to leftover food or dirty water. Lastly, providing fresh and clean feeding areas promotes good eating habits in sugar gliders, ensuring they consume nutritious meals without any contamination.
Handwashing Food Dishes
To start cleaning your sugar gliders’ food dishes, follow these simple steps:
- Gather warm soapy water: Fill a sink or basin with warm water and add a mild dish soap.
- Remove leftover food: Before washing the dishes, scrape off any remaining food particles into the trash.
- Soak dishes: Place the dishes in the soapy water and let them soak for a few minutes to loosen any stuck-on debris.
- Scrub gently: Using a soft sponge or brush, scrub the dishes thoroughly but gently to remove all traces of dirt.
- Rinse well: Rinse each dish under running water until all soap residue is gone.
- Air dry or towel dry: Allow the dishes to air dry completely or use a clean towel to dry them before placing fresh food inside.
Cleaning Water Bottles
Cleaning sugar glider water bottles requires some additional steps compared to washing food dishes. Here’s how you can effectively clean and sanitize their water bottles:
- Disassemble the bottle: Start by disassembling the water bottle completely, separating the cap, nozzle, and reservoir.
- Rinse with warm water: Rinse each part of the water bottle under warm running water to remove any visible debris.
- Clean with a bottle brush: Use a small brush specifically designed for cleaning bottles to scrub the inside of the reservoir and nozzle thoroughly.
- Sanitize: To sanitize the water bottle, prepare a solution of one part white vinegar to three parts water. Soak all parts in this solution for about 15 minutes.
- Rinse again: After sanitizing, rinse all parts thoroughly with clean water to remove any vinegar residue.
- Air dry: Allow each part of the water bottle to air dry completely before reassembling it.
By following these steps regularly, you’ll keep your sugar gliders’ feeding areas clean and hygienic, ensuring their health and happiness are always prioritized.
Remember, maintaining cleanliness in your sugar gliders’ food dishes and water bottles is essential for their overall well-being.
Maintaining cleanliness in food dishes and water bottles:
It’s not just about the bedding itself. Maintaining cleanliness in their food dishes and water bottles is equally important. Here are some tips on how to keep these essential items germ-free and safe for your furry friends.
Daily checks for contamination or spoilage in food dishes
Sugar gliders are sensitive creatures, and their health can be easily affected by contaminated or spoiled food. To ensure that their meals are always fresh and safe, make it a habit to check their food dishes daily. Look out for any signs of contamination, such as mold, fungus, or strange odors. If you notice anything unusual, discard the food immediately and thoroughly wash the dish before providing a new serving.
Regular replacement of water bottles to prevent bacterial growth
Water is crucial for your sugar glider’s well-being, but stagnant water can quickly become a breeding ground for bacteria. It’s essential to regularly replace their water bottles to prevent bacterial growth. Aim to change the water at least once a day and clean the bottle thoroughly every few days.
To clean the water bottle effectively, start by emptying any remaining water from it. Then disassemble all parts of the bottle, including the spout and cap if possible. Use warm soapy water or a mild dish soap to wash each component thoroughly. Pay extra attention to hard-to-reach areas like crevices or narrow openings where bacteria might hide.
After washing, rinse all parts with clean running water until no soap residue remains. You can also use a natural disinfectant specifically designed for pet supplies if desired. Once everything is clean and dry, reassemble the bottle and refill it with fresh water.
Storing clean dishes and bottles in a designated area away from potential contaminants
To maintain hygiene standards for your sugar glider’s food dishes and water bottles, it’s crucial to store them properly. Designate a specific area for clean dishes and bottles, away from potential contaminants like cleaning agents or other household items.
Consider using a separate cabinet or shelf solely for your sugar glider’s supplies. This will minimize the risk of accidental contamination and ensure that their dishes and bottles remain clean until the next use.
Remember, when handling your sugar glider’s food dishes and water bottles, always wash your hands thoroughly before and after to avoid transferring any germs.
By following these simple steps, you can maintain cleanliness in your sugar glider’s food dishes and water bottles, ensuring their health and well-being. Remember to check their food dishes daily for signs of spoilage, regularly replace their water bottles to prevent bacterial growth, and store clean items in a designated area away from potential contaminants. Your sugar gliders will thank you for providing them with a clean and safe environment!
Last Talk
In order to ensure the well-being of your sugar glider, it is crucial to maintain clean cages and bedding. Regular cleaning not only promotes a healthy environment for your pet but also helps prevent the growth of bacteria and odors. By following proper cleaning techniques and maintaining cleanliness in food dishes and water bottles, you can provide a safe and comfortable living space for your sugar glider.
Remember to rinse the cage with hot water for thorough cleaning, as this helps eliminate any remaining dirt or debris. Make sure to clean sugar glider food dishes and water bottles regularly to prevent the buildup of bacteria. Maintaining cleanliness in these areas is essential for your pet’s overall health.
To summarize, clean cages are vital for the well-being of sugar gliders. By adhering to proper cleaning practices and maintaining a hygienic environment, you can ensure that your furry friend stays happy and healthy.
Frequently Asked Questions (FAQs)
1.How often should I clean my sugar glider’s cage?
It is recommended to clean your sugar glider’s cage at least once a week. However, if you notice any soiling or strong odors before that time, it is best to clean it sooner.
2.Can I use soap or detergent when cleaning my sugar glider’s bedding?
It is generally advised to avoid using soap or detergent on sugar glider bedding as they may leave behind residues that can be harmful if ingested by the gliders. Hot water rinsing alone is usually sufficient.
3.Should I remove all the bedding while cleaning the cage?
It is not necessary to remove all the bedding during every cleaning session. Spot-cleaning soiled areas regularly will help maintain cleanliness without disturbing your pet’s nesting habits.
4.How do I know if my sugar glider’s food dishes are clean enough?
Cleanliness of food dishes can be ensured by washing them with hot water and a mild dish soap. Rinse thoroughly to remove any soap residue before refilling with fresh food.
5.Can I use vinegar to clean my sugar glider’s cage?
While vinegar is a natural cleaning agent, it is best to avoid using it directly on your sugar glider’s cage or accessories. The strong smell may be unpleasant for your pet, so stick to hot water rinsing for regular cleaning.